> ## Documentation Index
> Fetch the complete documentation index at: https://rivrdex.io/docs/llms.txt
> Use this file to discover all available pages before exploring further.
# First swap with the voucher
> A visual, step-by-step walkthrough: bridge USDT, then make your first RivrDEX swap with zero VARA using the gas voucher.
The voucher lets you make your **first swap without holding any VARA** to pay the
network fee — and that first swap is exactly how you get the VARA that covers
every swap afterward. Here's the full flow, screen by screen.
Prefer a text reference over screenshots? [Get tokens](/getting-started/get-tokens)
covers the same flow in a shorter, no-images format.
Go to the [Vara Bridge](https://bridge.vara.network/?network=mainnet) and
connect your **EVM wallet** (Ethereum side) and your
[**Vara wallet**](/getting-started/connect-wallet) (Vara side).
You'll bridge **USDT** from Ethereum. If you don't have USDT yet, you can get
some quickly through the [RivrDEX cross-chain swap](https://app.rivrdex.io/cross-chain)
(powered by Delora).
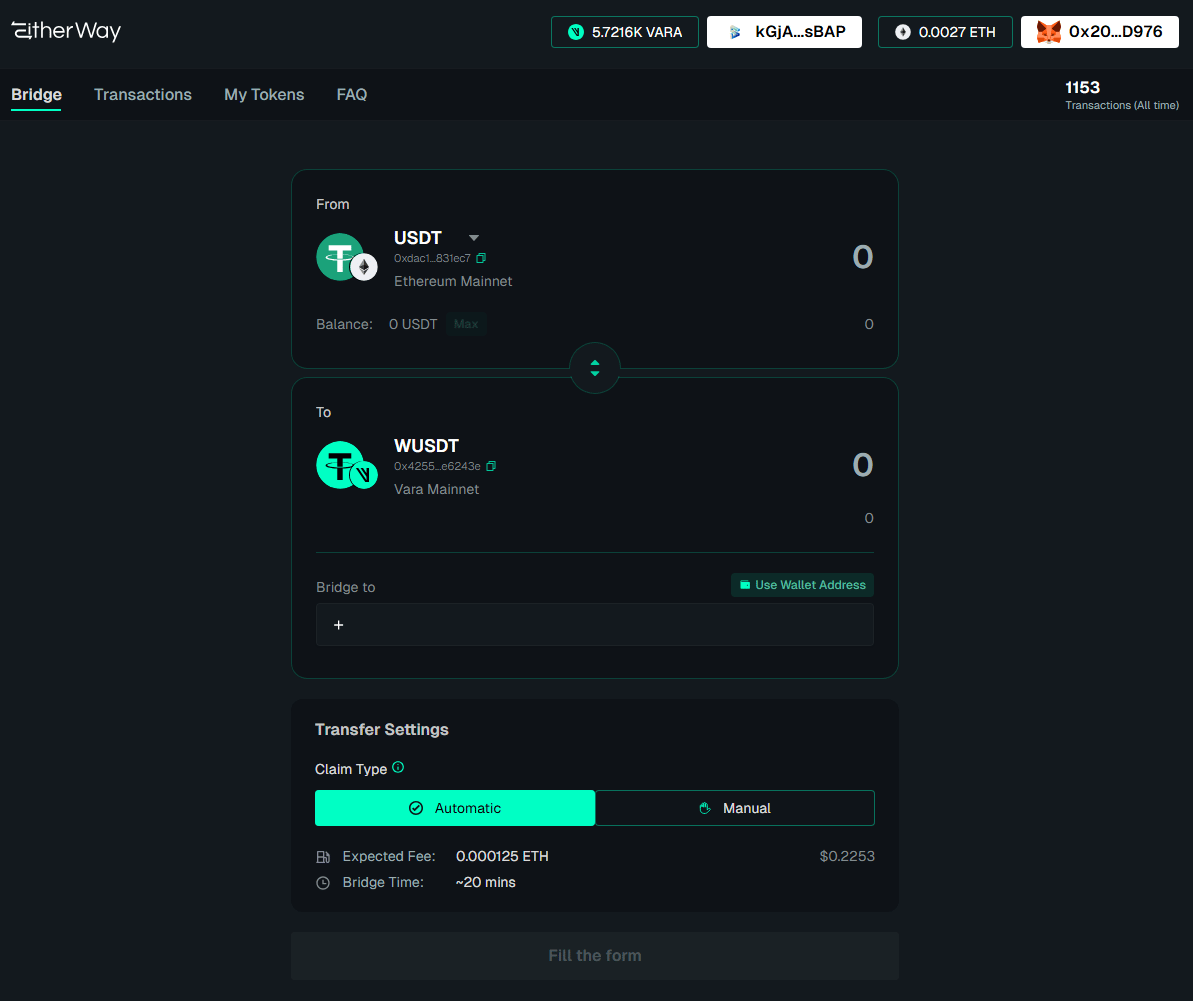 Set the pair to **USDT (Ethereum Mainnet) → wUSDT (Vara Mainnet)** and enter
the amount. Paste your Vara address in the **Bridge to** field, or click
**Use Wallet Address** to fill it automatically.
**Bridge USDT only.** RivrDEX currently trades against **wUSDT** — bridging
ETH or USDC gives you wrapped tokens you can't swap yet.
Set the pair to **USDT (Ethereum Mainnet) → wUSDT (Vara Mainnet)** and enter
the amount. Paste your Vara address in the **Bridge to** field, or click
**Use Wallet Address** to fill it automatically.
**Bridge USDT only.** RivrDEX currently trades against **wUSDT** — bridging
ETH or USDC gives you wrapped tokens you can't swap yet.
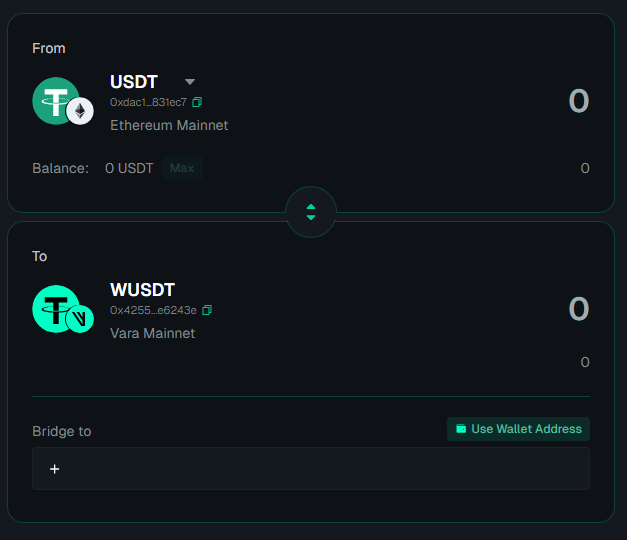 In **Transfer Settings**, pick how your tokens arrive:
* **Automatic** — tokens land in your wallet on their own, but you pay a small
extra fee in **ETH**.
* **Manual** — no extra ETH fee, but you claim the tokens yourself afterward,
which costs a fee in **VARA**.
While you're in **Transfer Settings**, also set **Transfer Speed** to **Fast** —
that's the \~20-minute option (Common is slower).
In **Transfer Settings**, pick how your tokens arrive:
* **Automatic** — tokens land in your wallet on their own, but you pay a small
extra fee in **ETH**.
* **Manual** — no extra ETH fee, but you claim the tokens yourself afterward,
which costs a fee in **VARA**.
While you're in **Transfer Settings**, also set **Transfer Speed** to **Fast** —
that's the \~20-minute option (Common is slower).
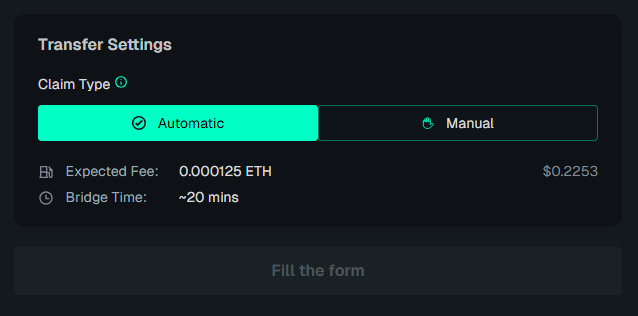 If this is your first bridge and you have **no VARA yet**, choose **Automatic**.
Manual claiming needs VARA for gas — exactly what you don't have yet.
Confirm the transaction in your wallet and wait — bridging takes about
**20 minutes**.
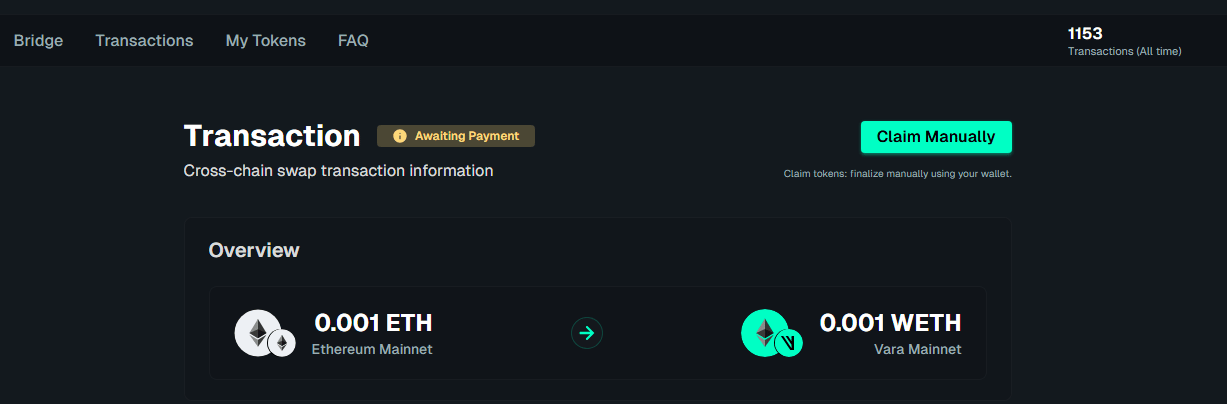
If you chose **Manual**, open the
[Transactions page](https://bridge.vara.network/transactions?network=mainnet)
after the bridge finishes and claim your tokens there.
If this is your first bridge and you have **no VARA yet**, choose **Automatic**.
Manual claiming needs VARA for gas — exactly what you don't have yet.
Confirm the transaction in your wallet and wait — bridging takes about
**20 minutes**.
If you chose **Manual**, open the
[Transactions page](https://bridge.vara.network/transactions?network=mainnet)
after the bridge finishes and claim your tokens there.
 Head to [RivrDEX](https://app.rivrdex.io/trade) and connect your Vara wallet.
Select the **wUSDT / VARA** pair, choose the amount, and confirm the swap.
Head to [RivrDEX](https://app.rivrdex.io/trade) and connect your Vara wallet.
Select the **wUSDT / VARA** pair, choose the amount, and confirm the swap.
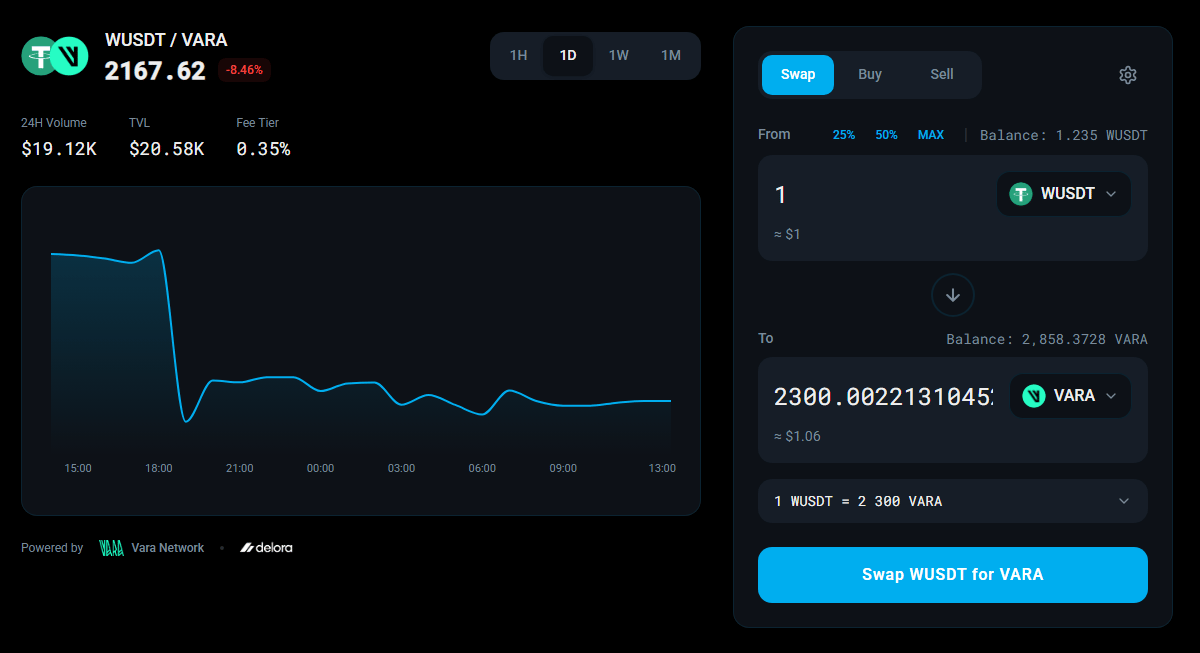 **Your first swap is free.** RivrDEX covers the network fee for it — it works
even with a zero VARA balance. After it settles you're holding VARA, which
pays the gas for everything you do next.
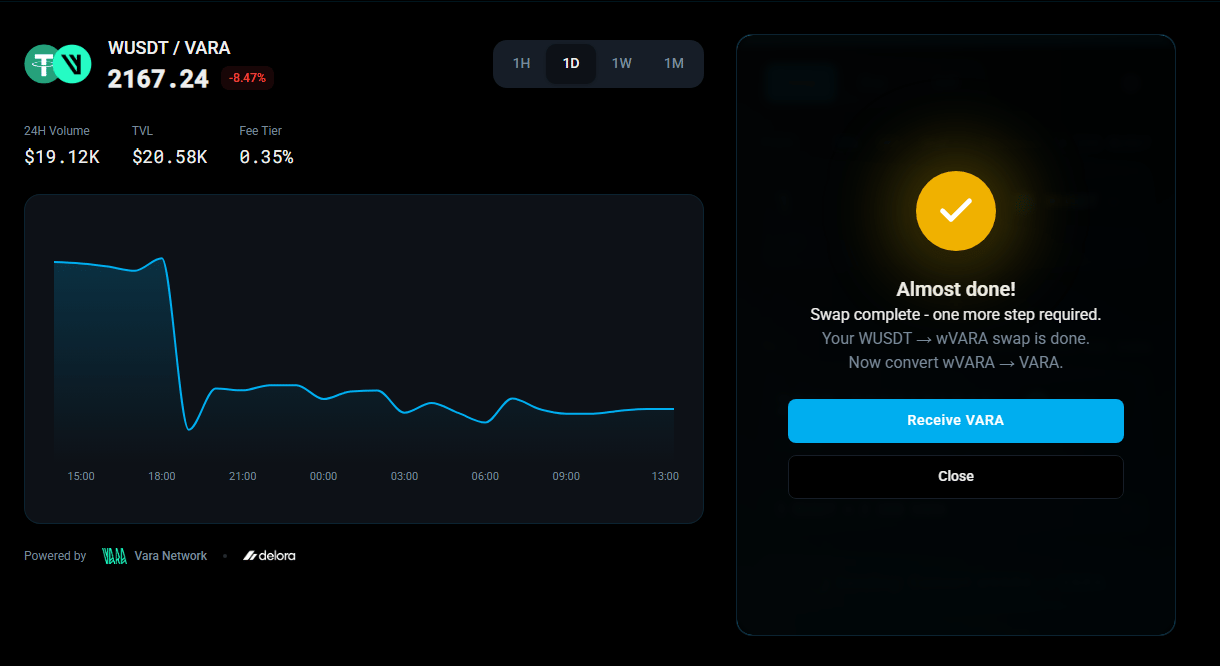
Some swaps deliver **wVARA** (wrapped VARA). It's the same value — just convert
it to native VARA in one click when the **Receive VARA** dialog appears.
**Your first swap is free.** RivrDEX covers the network fee for it — it works
even with a zero VARA balance. After it settles you're holding VARA, which
pays the gas for everything you do next.
Some swaps deliver **wVARA** (wrapped VARA). It's the same value — just convert
it to native VARA in one click when the **Receive VARA** dialog appears.
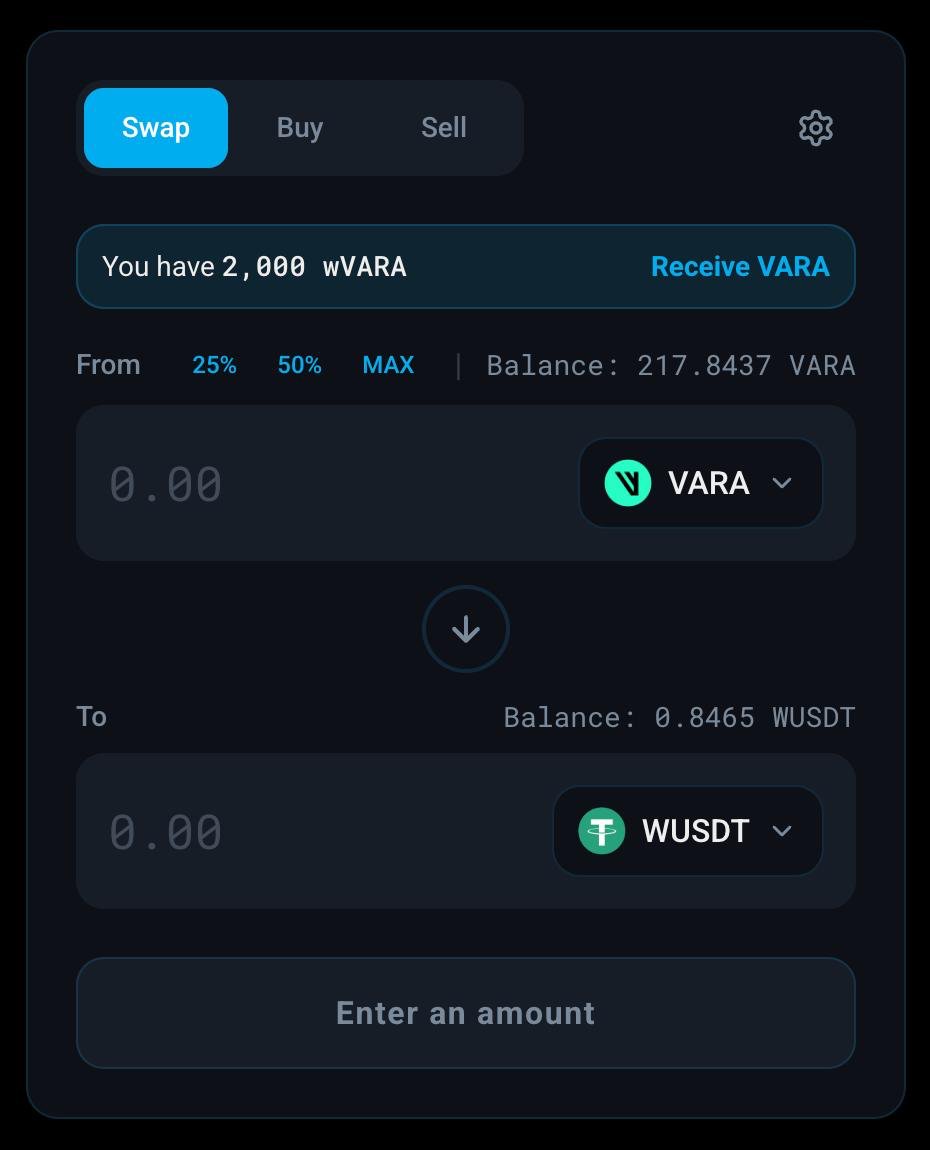
 Missed the dialog? No need to go anywhere — whenever your wallet holds wVARA,
the [Swap page](https://app.rivrdex.io/trade) shows a **"You have … wVARA"**
banner at the top. Click **Receive VARA** and it converts on the spot, any time.
Missed the dialog? No need to go anywhere — whenever your wallet holds wVARA,
the [Swap page](https://app.rivrdex.io/trade) shows a **"You have … wVARA"**
banner at the top. Click **Receive VARA** and it converts on the spot, any time.
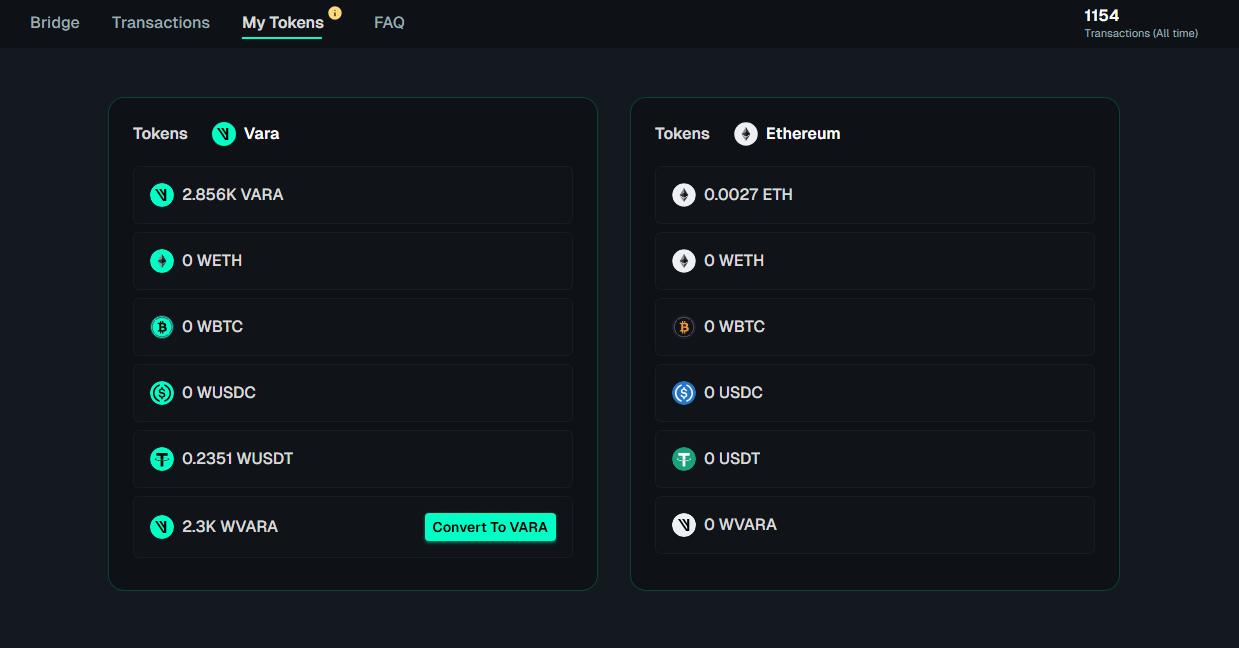
 You can also convert on the bridge: open the
[**My Tokens** tab](https://bridge.vara.network/my-tokens?network=mainnet) and
click **Convert To VARA** next to your wVARA balance.
You can also convert on the bridge: open the
[**My Tokens** tab](https://bridge.vara.network/my-tokens?network=mainnet) and
click **Convert To VARA** next to your wVARA balance.
 That's it — you used the voucher for your first swap, and you now hold enough VARA
to cover the fees on every swap that follows.
## FAQ
No. You don't need any VARA to pay gas on your first swap — the network fee is
covered for you.
No. The claim type (Automatic or Manual) is fixed once you confirm.
[Coinbase](https://www.coinbase.com/price/vara-network),
[Gate.io](https://www.gate.io/trade/VARA_USDT), and
[Crypto.com](https://crypto.com/price/vara-network). Withdraw on the native
Vara Network — see [Get tokens](/getting-started/get-tokens) for details.
No. The voucher only covers your **first** swap. After that you pay the standard
fee, using the VARA you received from that first swap.
That's it — you used the voucher for your first swap, and you now hold enough VARA
to cover the fees on every swap that follows.
## FAQ
No. You don't need any VARA to pay gas on your first swap — the network fee is
covered for you.
No. The claim type (Automatic or Manual) is fixed once you confirm.
[Coinbase](https://www.coinbase.com/price/vara-network),
[Gate.io](https://www.gate.io/trade/VARA_USDT), and
[Crypto.com](https://crypto.com/price/vara-network). Withdraw on the native
Vara Network — see [Get tokens](/getting-started/get-tokens) for details.
No. The voucher only covers your **first** swap. After that you pay the standard
fee, using the VARA you received from that first swap.