The voucher lets you make your first swap without holding any VARA to pay the network fee — and that first swap is exactly how you get the VARA that covers every swap afterward. Here’s the full flow, screen by screen.
Prefer a text reference over screenshots? Get tokens covers the same flow in a shorter, no-images format.
1

Open the Vara Bridge and connect both wallets
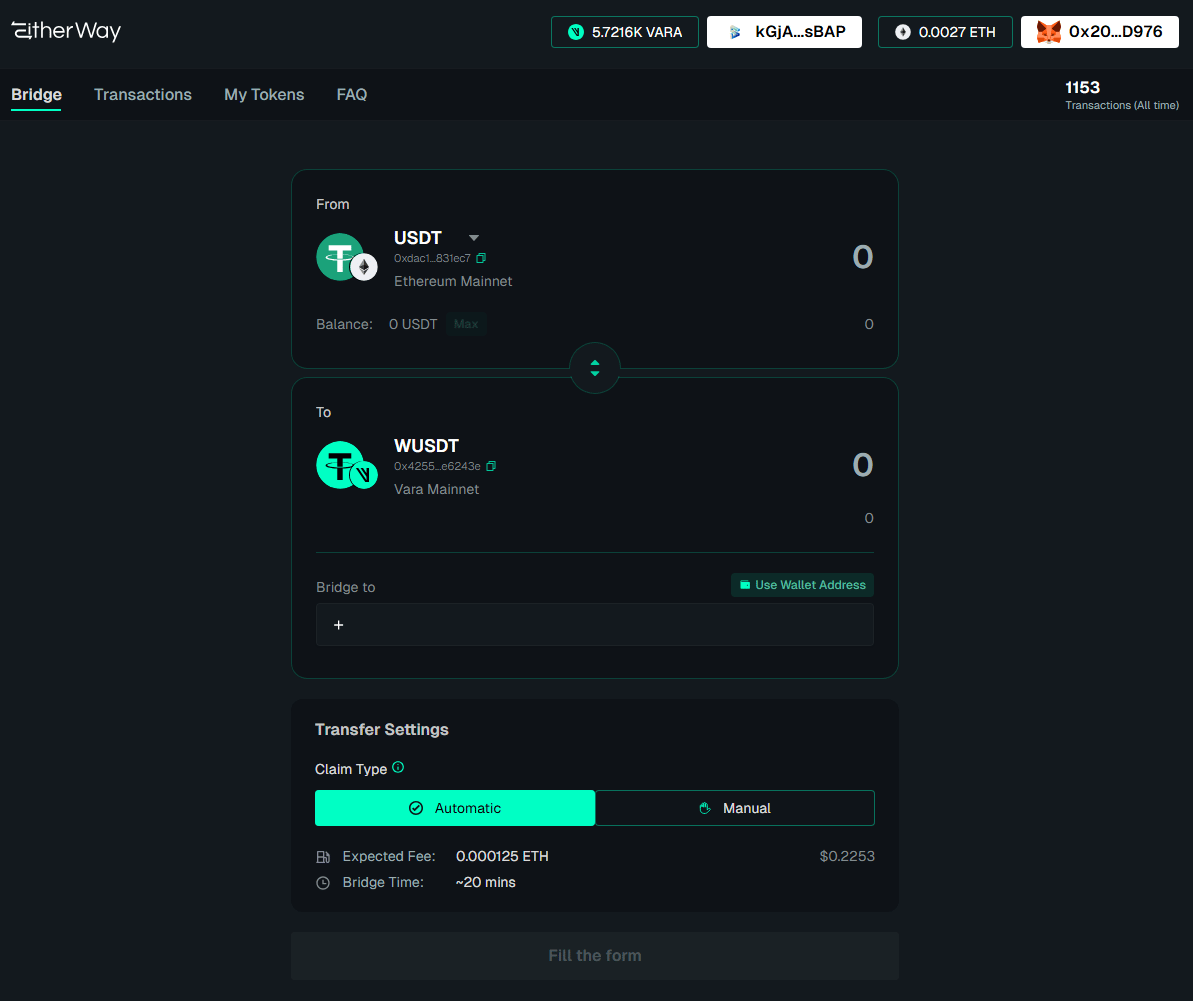
Go to the Vara Bridge and connect your EVM wallet (Ethereum side) and your Vara wallet (Vara side).You’ll bridge USDT from Ethereum. If you don’t have USDT yet, you can get some quickly through the RivrDEX cross-chain swap (powered by Delora).
Vara Bridge interface showing USDT to wUSDT and Transfer Settings
2

Select the USDT → wUSDT pair

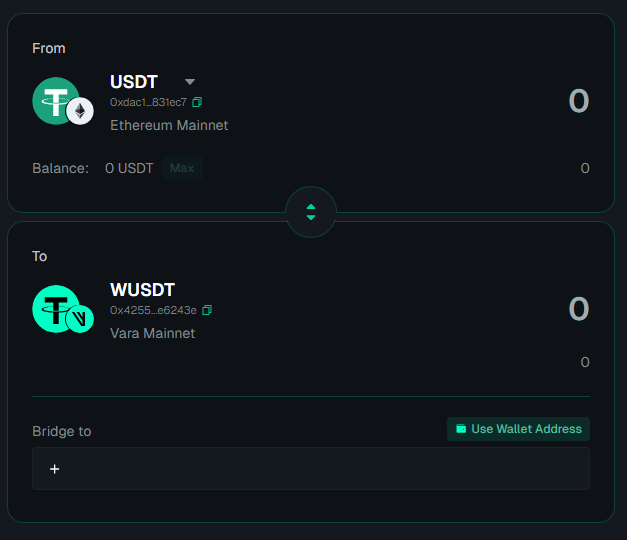
Set the pair to USDT (Ethereum Mainnet) → wUSDT (Vara Mainnet) and enter the amount. Paste your Vara address in the Bridge to field, or click Use Wallet Address to fill it automatically.
Bridge USDT only. RivrDEX currently trades against wUSDT — bridging ETH or USDC gives you wrapped tokens you can’t swap yet.
Bridge pair selection: USDT to wUSDT with Bridge-to address field
3

Choose the claim type

In Transfer Settings, pick how your tokens arrive:
  • Automatic — tokens land in your wallet on their own, but you pay a small extra fee in ETH.
  • Manual — no extra ETH fee, but you claim the tokens yourself afterward, which costs a fee in VARA.
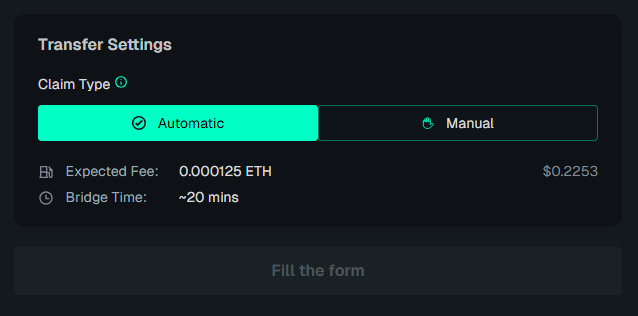
While you’re in Transfer Settings, also set Transfer Speed to Fast — that’s the ~20-minute option (Common is slower).
Claim type selector showing Automatic and Manual options
If this is your first bridge and you have no VARA yet, choose Automatic. Manual claiming needs VARA for gas — exactly what you don’t have yet.
4

Confirm and wait for the bridge (~20 min)
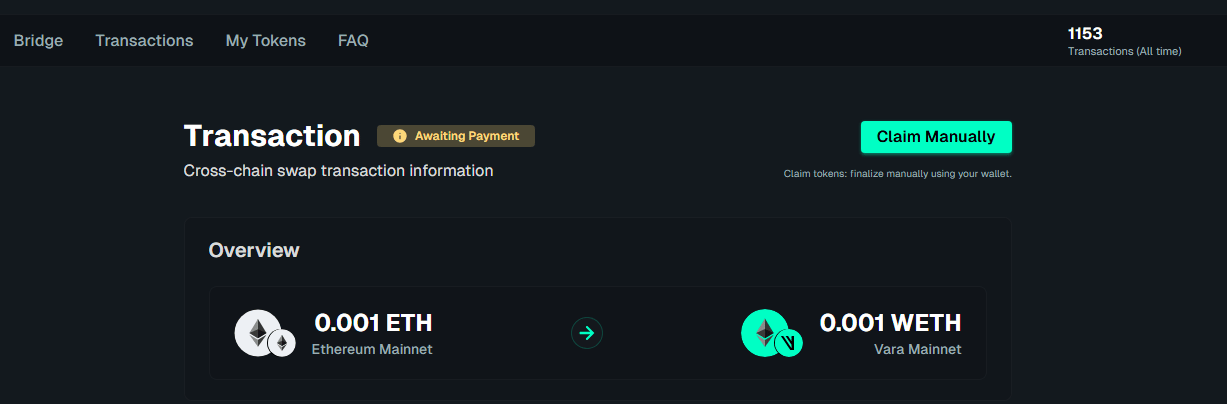
Confirm the transaction in your wallet and wait — bridging takes about 20 minutes.If you chose Manual, open the Transactions page after the bridge finishes and claim your tokens there.
Vara Bridge Transactions page for manual claiming
5

Open RivrDEX and connect your wallet

Head to RivrDEX and connect your Vara wallet.
6

Swap wUSDT → VARA

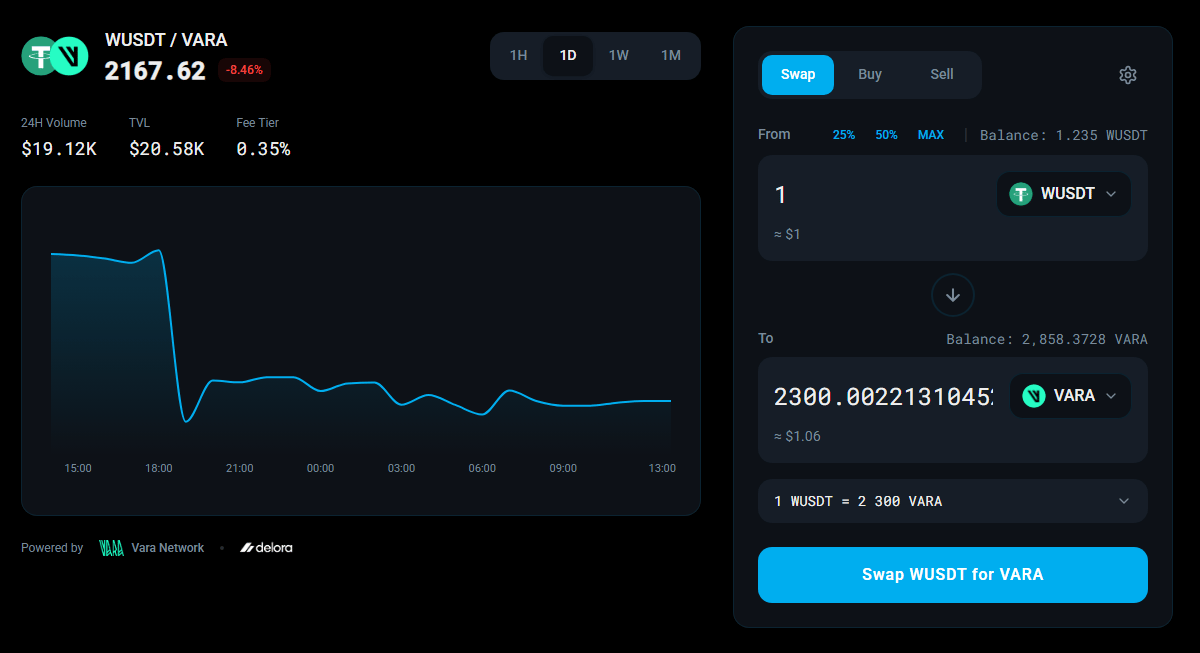
Select the wUSDT / VARA pair, choose the amount, and confirm the swap.
RivrDEX swap interface for wUSDT to VARA
Your first swap is free. RivrDEX covers the network fee for it — it works even with a zero VARA balance. After it settles you’re holding VARA, which pays the gas for everything you do next.
7

Convert wVARA → VARA

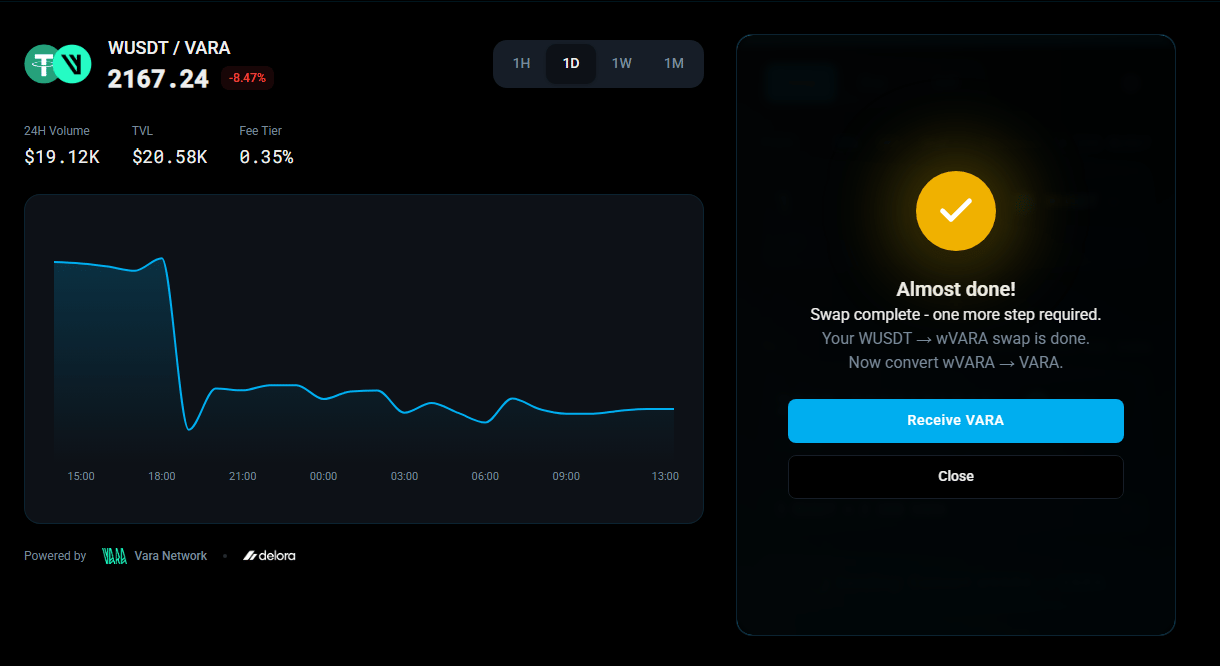
Some swaps deliver wVARA (wrapped VARA). It’s the same value — just convert it to native VARA in one click when the Receive VARA dialog appears.
Convert wVARA to VARA dialog
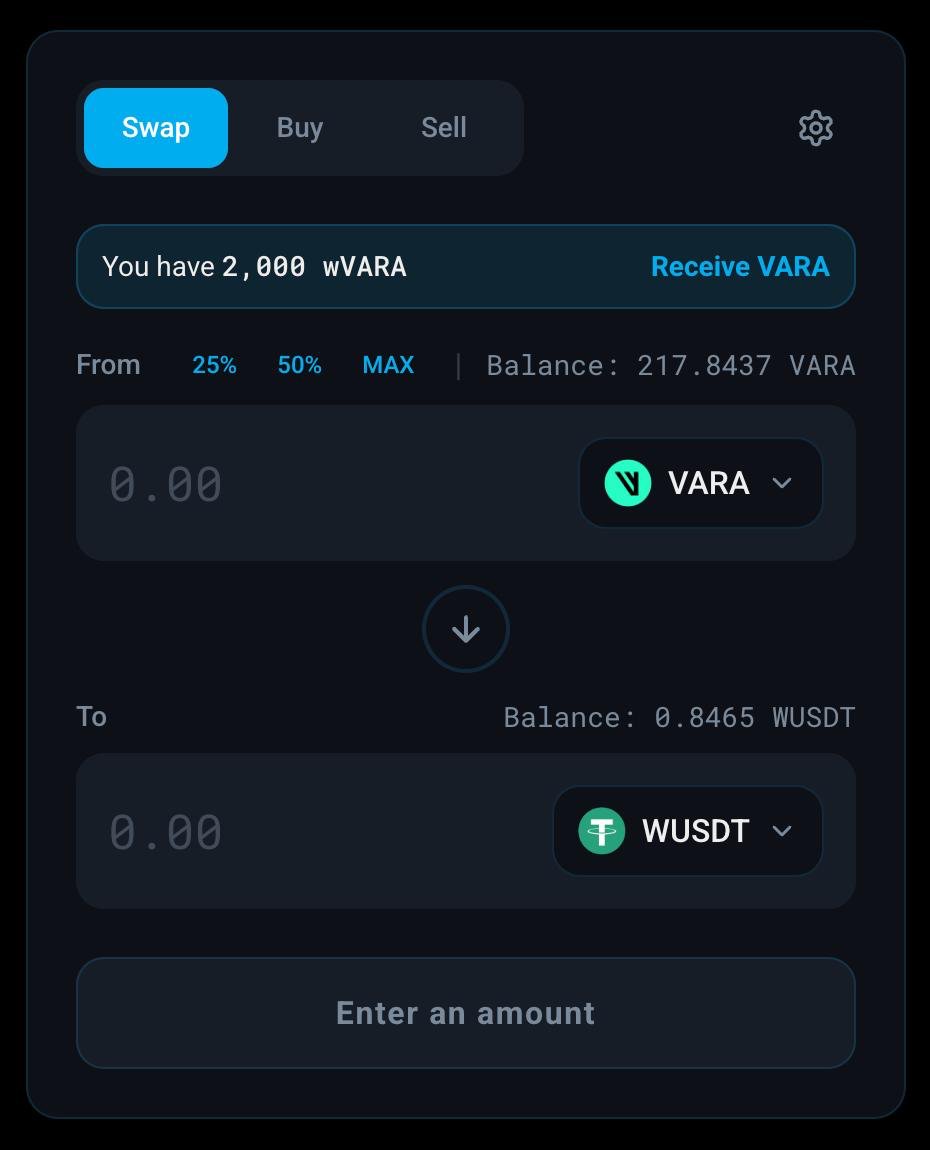
Missed the dialog? No need to go anywhere — whenever your wallet holds wVARA, the Swap page shows a “You have … wVARA” banner at the top. Click Receive VARA and it converts on the spot, any time.
RivrDEX Swap page showing the You have wVARA banner with a Receive VARA button
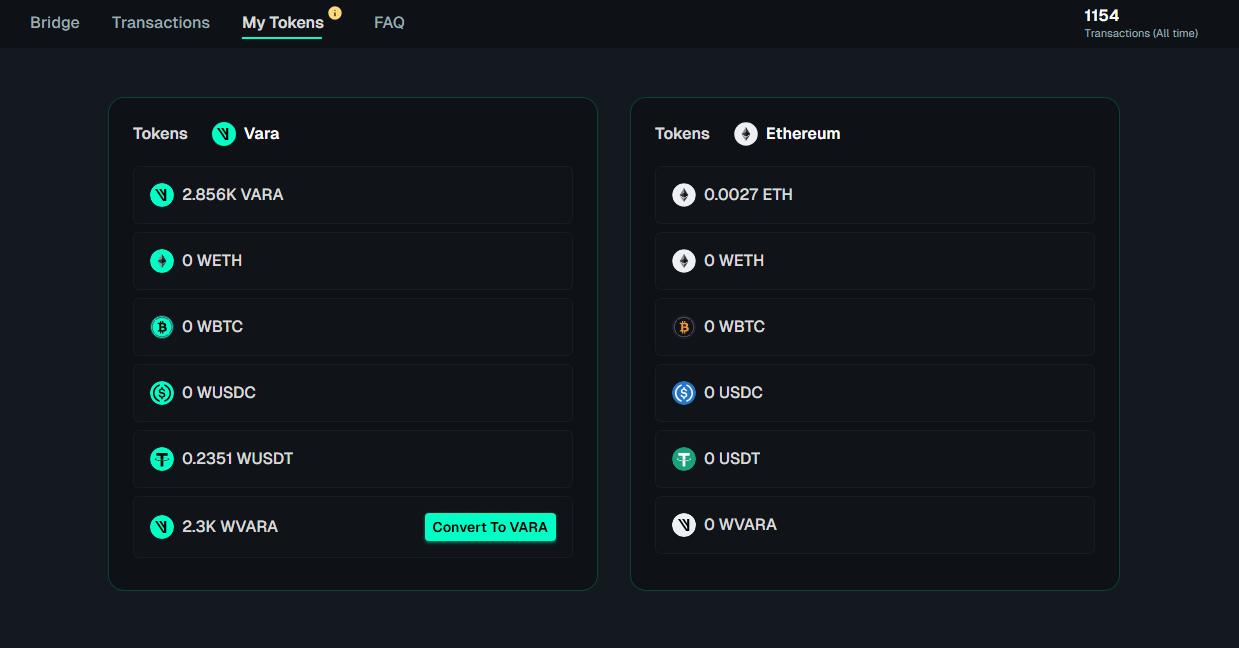
You can also convert on the bridge: open the My Tokens tab and click Convert To VARA next to your wVARA balance.
My Tokens tab on the Vara Bridge showing a wVARA balance to convert
That’s it — you used the voucher for your first swap, and you now hold enough VARA to cover the fees on every swap that follows.

FAQ

No. You don’t need any VARA to pay gas on your first swap — the network fee is covered for you.
No. The claim type (Automatic or Manual) is fixed once you confirm.
Coinbase, Gate.io, and Crypto.com. Withdraw on the native Vara Network — see Get tokens for details.
No. The voucher only covers your first swap. After that you pay the standard fee, using the VARA you received from that first swap.